Hello to everyone.
I got quite a bit of useful info from this forum and just wanted to give something back. So thanks to all you posters down-under and everywhere else.
According to manufacturer instructions in the workshop manual under the 4JX1 engine, a routine tolerance inspection must be done to the turbo unit (though they don’t state how often) in case you suspect a problem with the unit. See below the relevant page in the manual:

As mentioned in the page above, if tolerances exceed the limit value, the turbo is to be sent to IHI for “major” maintenance in order to avoid damage that may occur to the turbine blades which may subsequently lead to engine damage.
At this stage I would just like to mention that the task at hand requires a fair degree of proficiency. I have no wish to deter any of you, and I’m guessing that each of you has a good bearing weather you’re up to it. Mind you that a turbo spins at fantastic speeds (150,000 RPM and more) and a slight misbalance can cause damage.
That said, I am not the first (or last) nutter who has done this job with no major issues and if you’ve done your fair share of greasing your elbows (god knows, if you have a Jack you have) then there should be nothing stopping you from proceeding. Having your turbo rebuilt in a shop is far from cheap…
FYI, I never recommend procedures that I have not tested on my own car. I have done this rebuild on Sep-2012 and have driven about 10,000 km since with no ill effects.
Before we begin I recommend dismantling the black plastic intake pipe going from the air filter to the turbo, now grab the nut holding the turbine blades and try to wiggle it from side-to-side and in-and-out, if it feels loose maintenance is probably in order. You can also take off the rubber pipe going from the turbo to the intercooler and check if you have oil in the intercooler. Mind you that if you do it may also (and more probably) be from the rocker lid vent. In any case, the idea is to make sure rebuilding the turbo is necessary before taking it all apart.
So let’s go…
First thing we have to do is take out the turbo unit.
1. Remove the intercooler and cover it’s openings to avoid dirt getting in

2. Cover the turbo exit pipe and remove the heat shield (it’s held by 4 screws, I have only 2)

3. Take out the heat shield (probably better to do step 4 first but not a must)

4. Remove the intercooler support (2 screws)

5. Remove the black intake pipe leading from the air filter to the turbo
6. Cover the turbo intake port and the intake pipe to the manifold
Note: I find it best to use plastic bags since they leave no fibers

7. Remove the turbo coolant input (in red) and cap the ends to avoid leaks
8. Dismantle the input oil banjo (in green)

The job gets a bit tricky here due to limited finger & tool access
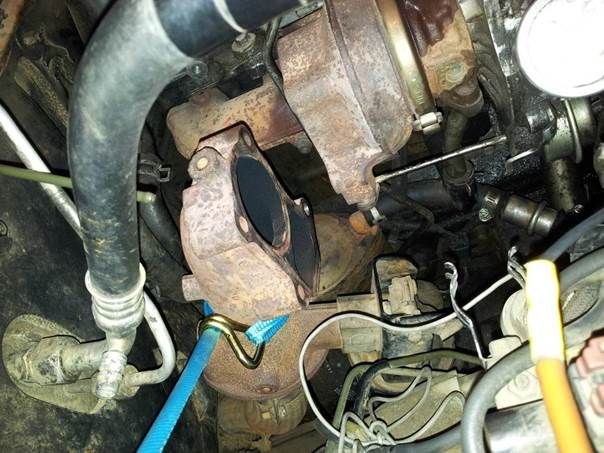
9. Get a socket wrench in there and loosen the two bolts holding the oil drain (marked in green) this will later enable access to one of the nuts holding the turbo unit marked in red. I recommend not removing the drain at this stage, just loosen the bolts

10. Now remove the 4 nuts connecting the exhaust housing to the turbo. I went ahead and removed all 4 double sided bolts as well in order to get the exhaust housing out of the way
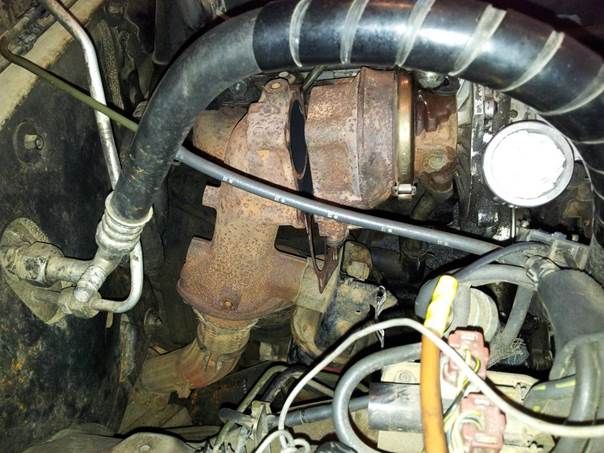
11. Instead of removing the exhaust housing, I simply moved it out of the way as shown in the following 2 images